Photoshop Fundamental: Layer & Layer Mask
- grey1217
- Dec 12, 2019
- 5 min read
Updated: Sep 16, 2021
If you ask me, what makes Photoshop such a powerful editing software?
I would say Layer & Layer Mask. It is the core of Photoshop; every editing in Photoshop are base on that.
It is also the first thing you should understand if you want to learn using Photoshop.
Here, I will guide you through WHAT is Layer & Layer MASK, WHY you need them, and HOW to use them.
This blog post is for anyone NEW to Photoshop, so no worry if this is the first time you are using (or haven’t) Photoshop.
If you don’t have Photoshop installed on your computer, you can always get a trial version at the Adobe website (https://www.adobe.com/sea/creativecloud/photography.html).
WHAT IS LAYER?
Let’s start with the Layer first.
In Photoshop, everything can appear as a Layer, regardless of a photo, an adjustment, a folder or text.
If you load a photo in Photoshop, you will see the photo showing in the below screenshot.
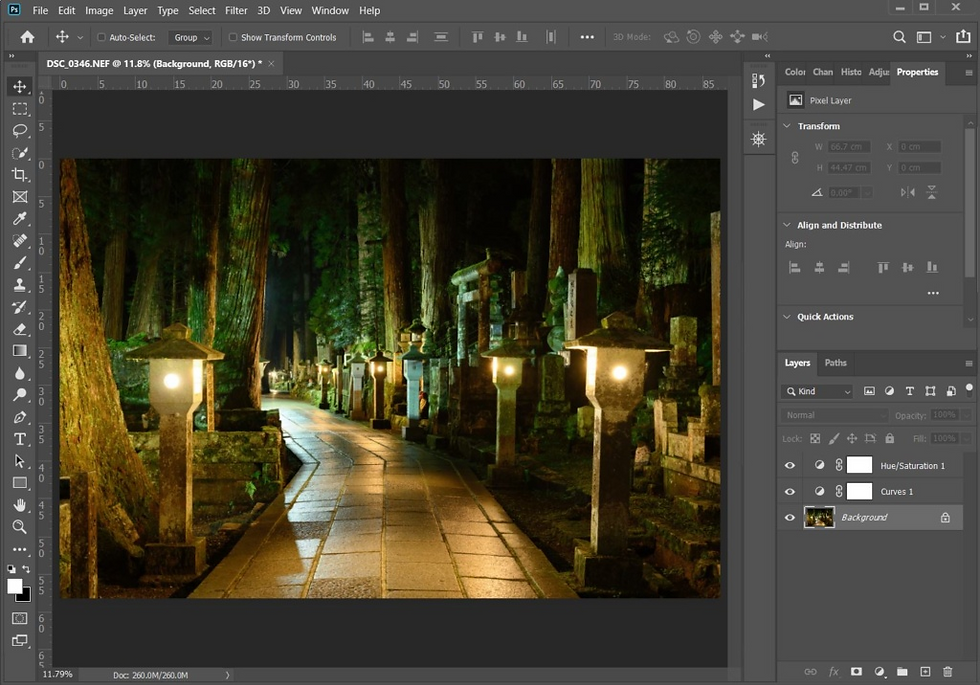
Here’s a brief explanation of Photoshop INTERFACE.
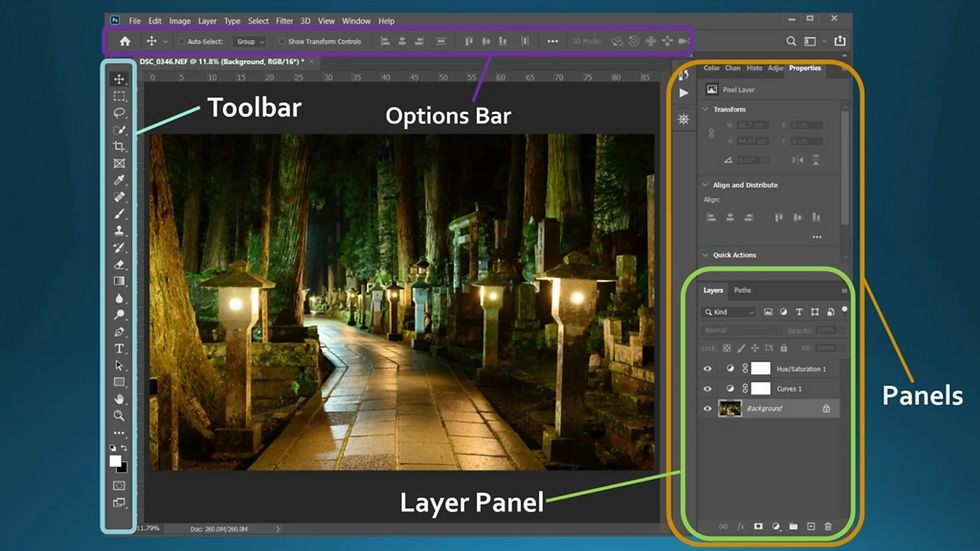
On the right side, there’s a LAYER PANEL. If you don’t see one, you can go to the TOP menu bar there, Click on Window > Layers, to open the panel. Or click on the LAYER TAB to expand the Layer panel.
Inside the LAYER panel, we have three items and each of them is a LAYER.
The bottom LAYER contains an image, and it is an IMAGE LAYER.
You can make any editing on this IMAGE LAYER, or you can use ADJUSTMENT LAYER to do the editing.
*Note, by default, when you open an image in Photoshop, it will appear as a Background LAYER, and it is LOCKED by default. If you wish to edit this IMAGE LAYER, you will have to UNLOCK it first by DOUBLE CLICK on the LOCK icon. If you create any NEW IMAGE LAYER, it will be UNLOCKED by default.
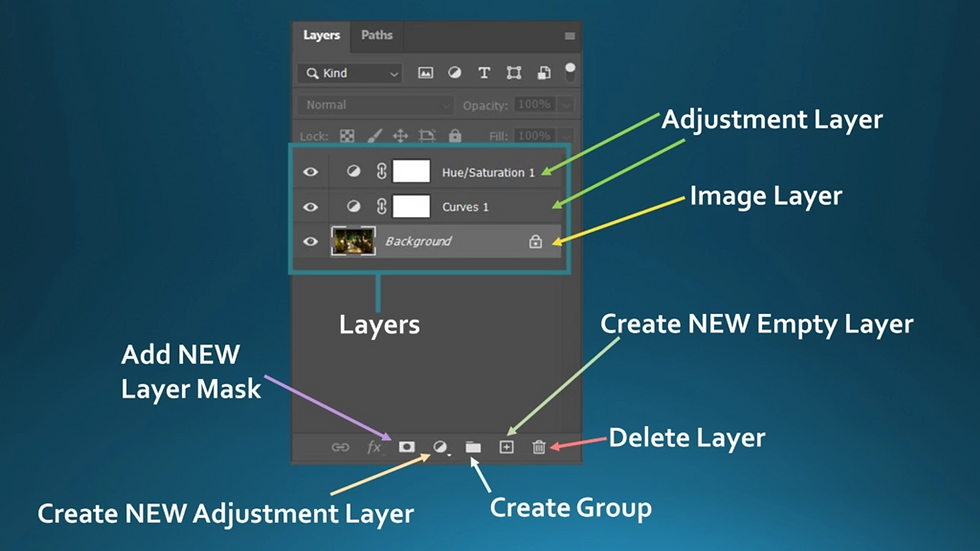
The two LAYERS above the Background Layer are ADJUSTMENT LAYERS.
Each ADJUSTMENT LAYER represents a SINGLE type of ADJUSTMENTS.
Here we have Curves and Hue/Saturation Adjustment Layers.
You can use a Curve adjustment layer to increase/decrease the brightness of the midtone, shadow and highlight of the photo. Also, increase/decrease the contrast.
For Hue/Saturation, you can change the hue, saturation and luminance of the photo.
If you want to add another ADJUSTMENT LAYER, you can click on the Create NEW Adjustment Layer icon, and you will see a list of available Adjustments. Select any of them to create a new adjustment layer.
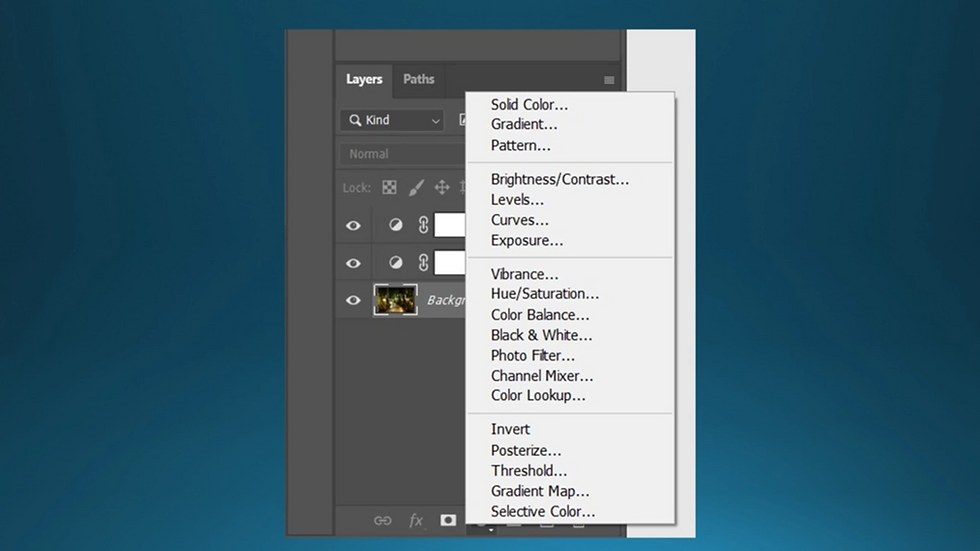
ADJUSTMENT LAYER is different from IMAGE LAYER. It does not contain an IMAGE, so you can’t do any SPOT REMOVAL, CLONE & STAMP or FILLING it with a COLOUR.
Because of that, the ADJUSTMENT LAYER has a much smaller size than the IMAGE LAYER. This help to control the Photoshop file size for better software performance. So, two types of LAYERS:
IMAGE LAYER
ADJUSTMENT LAYER
There are also TYPE and SHAPE LAYERS, but let’s not focus on those two first. I want to keep the learning as simple as possible for now.
Next, we talk about the LAYER MASK.
WHAT IS LAYER MASK?
Every Layer in Photoshop can have a LAYER MASK.
When you create a NEW ADJUSTMENT LAYER, it comes with the LAYER MASK by default.
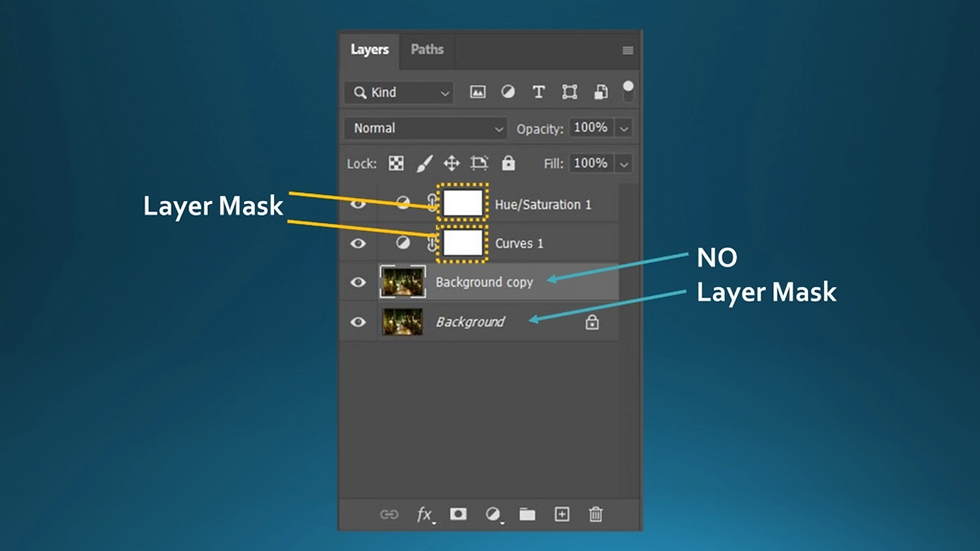
When you create a NEW IMAGE LAYER, there’s no LAYER MASK, but you can add a LAYER MASK by clicking on the icon at the bottom of the LAYER panel.
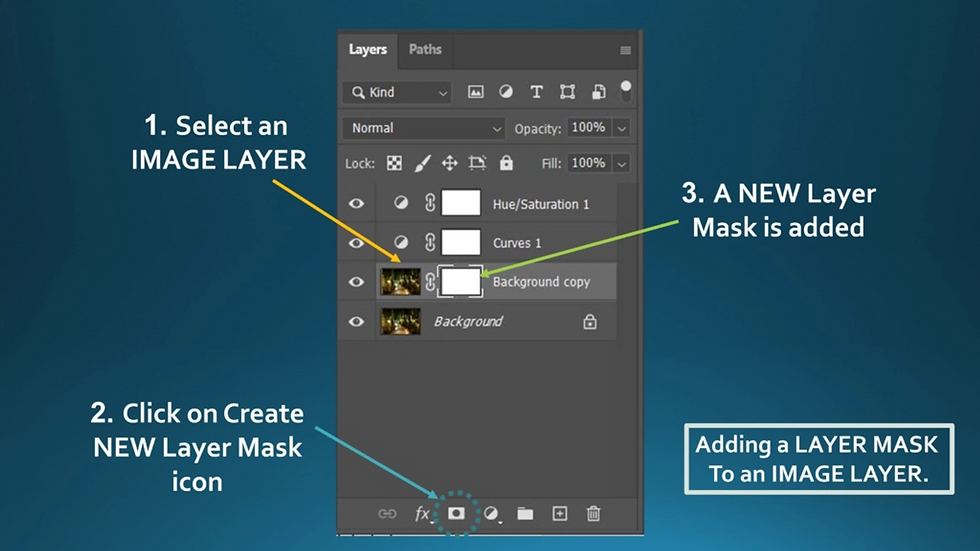
*You can do the same to any other LAYERS (GROUP, SHAPE, TYPE, etc.) to add a LAYER MASK.
WHY DO WE NEED LAYER MASK?
LAYER MASK allows you to do a SELECTIVE ADJUSTMENT on a specific area of a photo, brightening a certain area, adding vignette around the edges, changing colours of a particular object in a frame, etc.
SELECTIVE ADJUSTMENT is the key to come out with a well-edited photo, and you need to use LAYER MASK to achieve that.
If you want to make your subject more POP, you use a LAYER MASK to brighten only your subject.
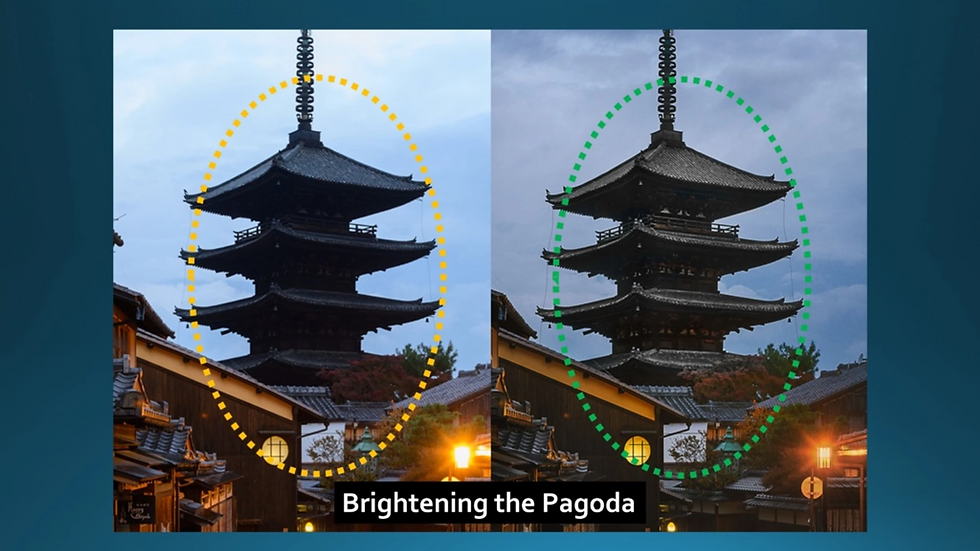
Using the above photo as an example, you can see that a part of the pagoda is brightened, revealing more details of the building.
If you have a photo with the OVEREXPOSED highlight, you use a LAYER MASK to recover only the detail of that area.
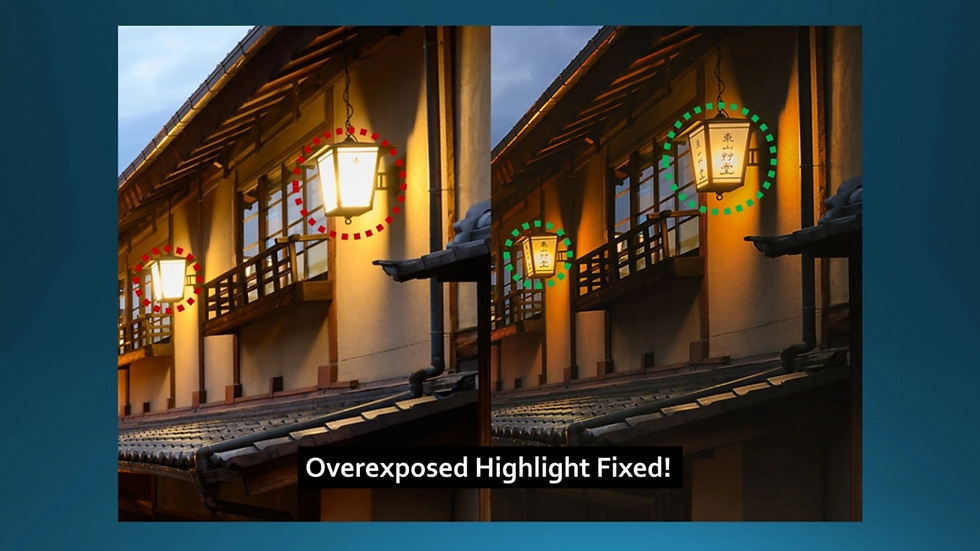
If you want to enhance the colour of the Milky Way, you use a LAYER MASK to saturate only it.
You can even do a sky replacement with the help of the LAYER MASK to change only the sky area.
There are many things you can do with the LAYER MASK.
HOW TO USE LAYER MASK?
To start with, you can open any of your photos in Photoshop.

Let’s start with something simple. We will brighten the centre of the photo using Curves Adjustment Layer and Layer Mask.
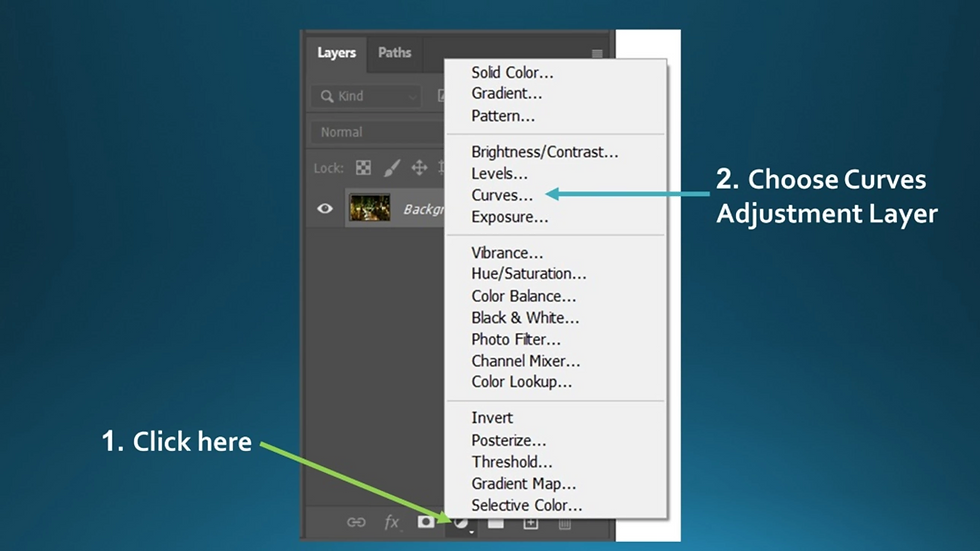
First, click on the Create New Adjustment Layer icon and choose Curves to create a new Curves Adjustment Layer. You will see a new layer called Curves 1 showing on your screen.
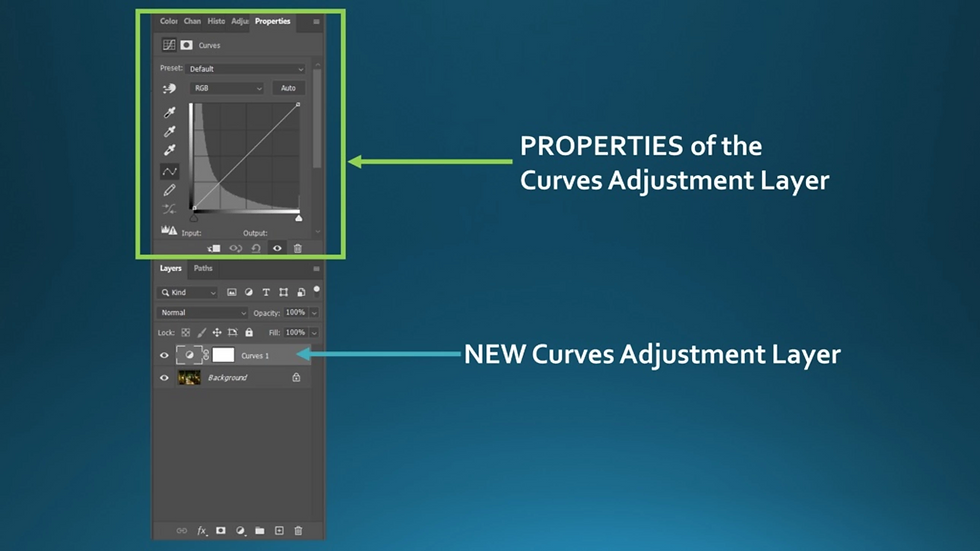
At the same time, the PROPERTIES PANEL should be shown on your screen with corresponding ADJUSTMENT PROPERTIES for the CURVES Adjustment Layer.
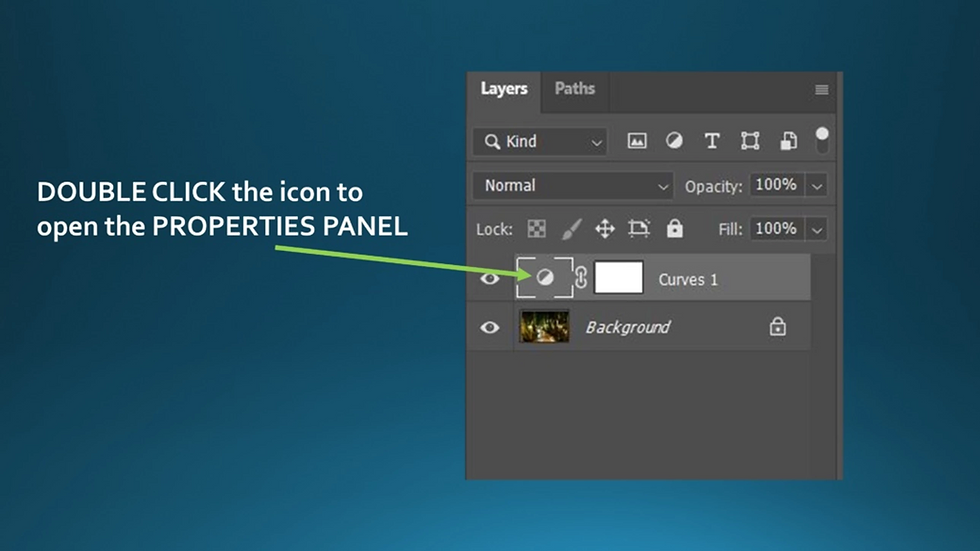
If you don’t see the PROPERTIES PANEL, you can DOUBLE CLICK on the CURVES Adjustment Layer icon to open the panel. *Don’t click on the LAYER MASK!
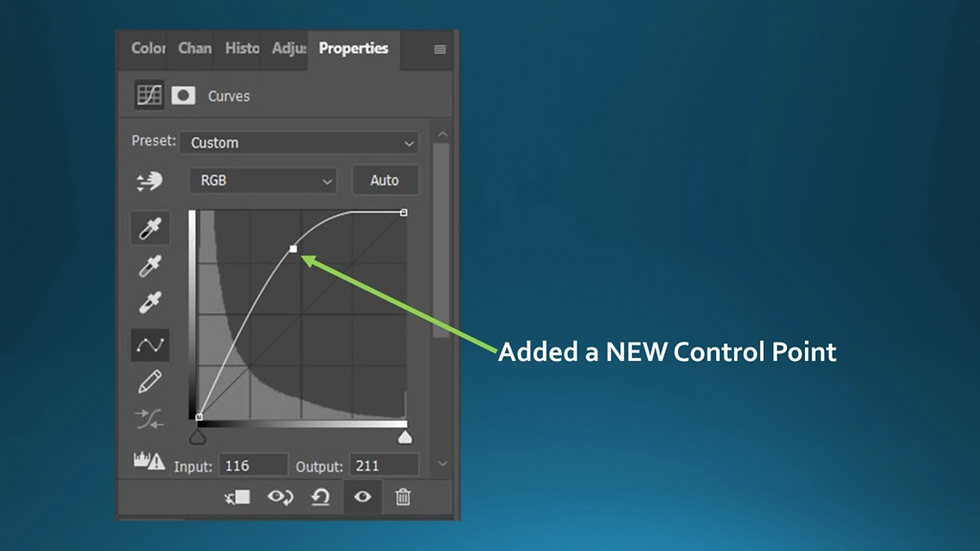
At the PROPERTIES PANEL, click on the centre of the line, this will create a CONTROL POINT on that line. Now, pull the line UP by moving the CONTROL POINT.
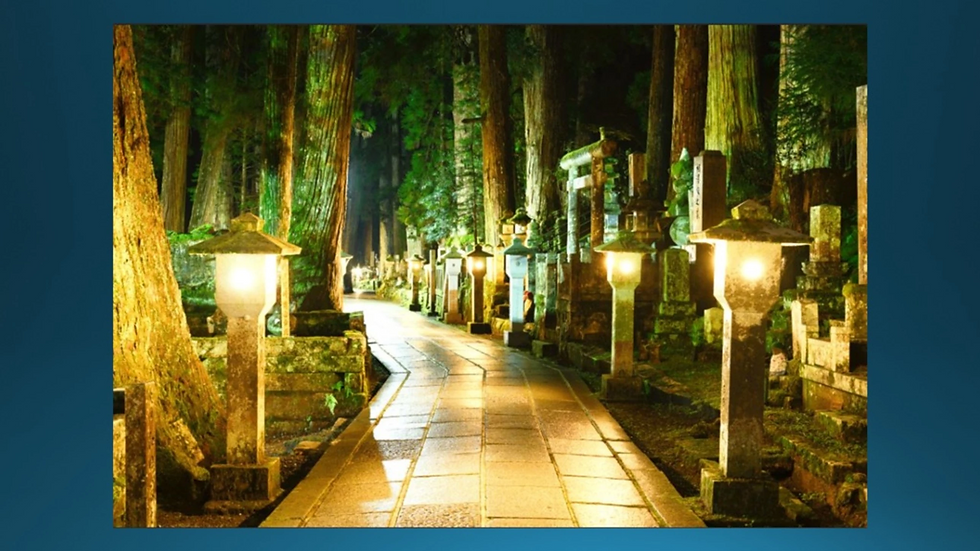
The photo gets a lot brighter now.
Note: I usually would prefer a much subtle adjustment, but for the sake of the demo, the adjustment here is overdone intentionally. So, you can see the result in an obvious way.
As you can see, the photo gets a lot brighter now, but our purpose is to brighten ONLY the centre of the photo instead of the whole photo.
To do that, we need to use LAYER MASK.
Now, click on the LAYER MASK icon of that CURVES Adjustment Layer.
*You should also have a better idea now that clicking on a different part of the layer will open the different properties window and for you to perform various editing methods. You can refer to an illustration photo at the end of this article for a better understanding.
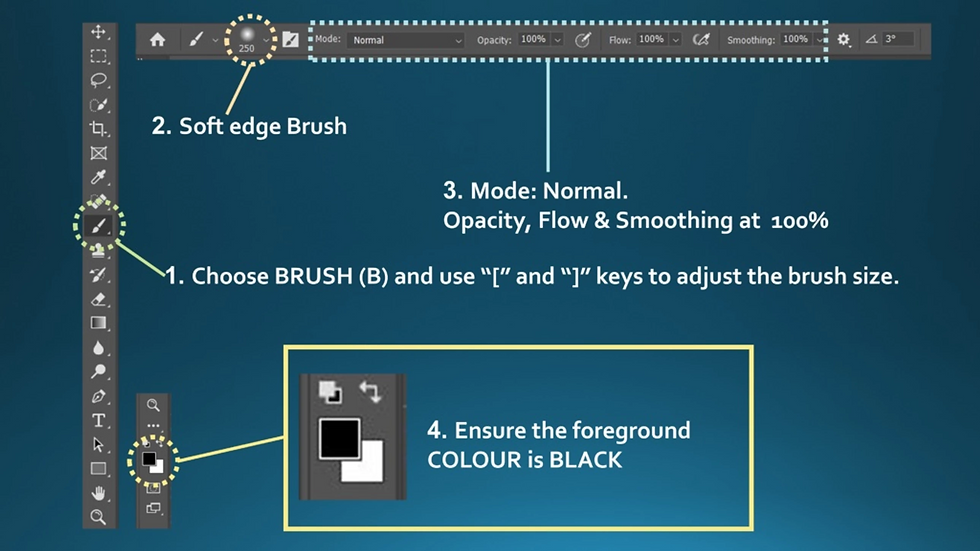
Select the BRUSH tool from the toolbar, choose a Soft Edge Brush and ensure that the Blending Mode is Normal, and Opacity, Flow and Smoothing are all 100%.
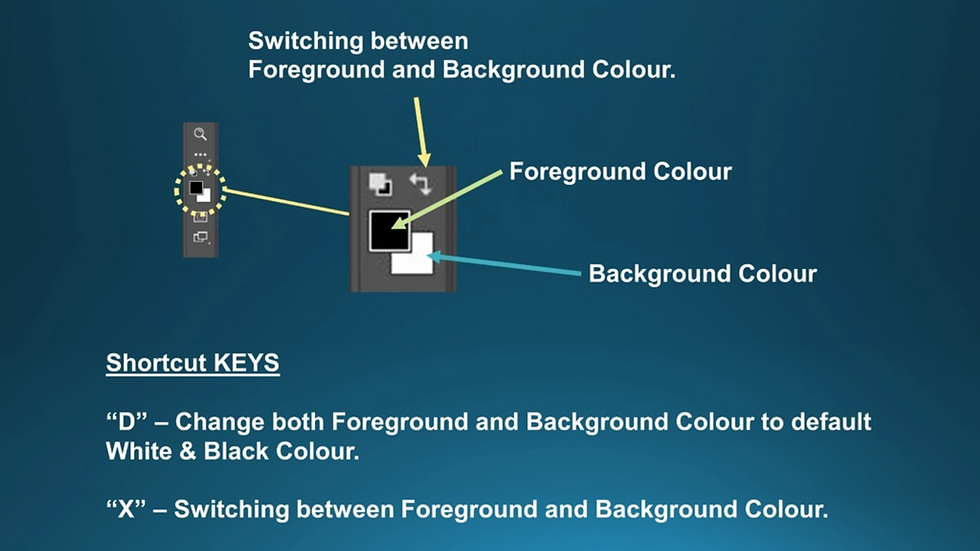
Also, ensure the Foreground Colour is BLACK so that you can paint BLACK Colour on the Layer Mask.
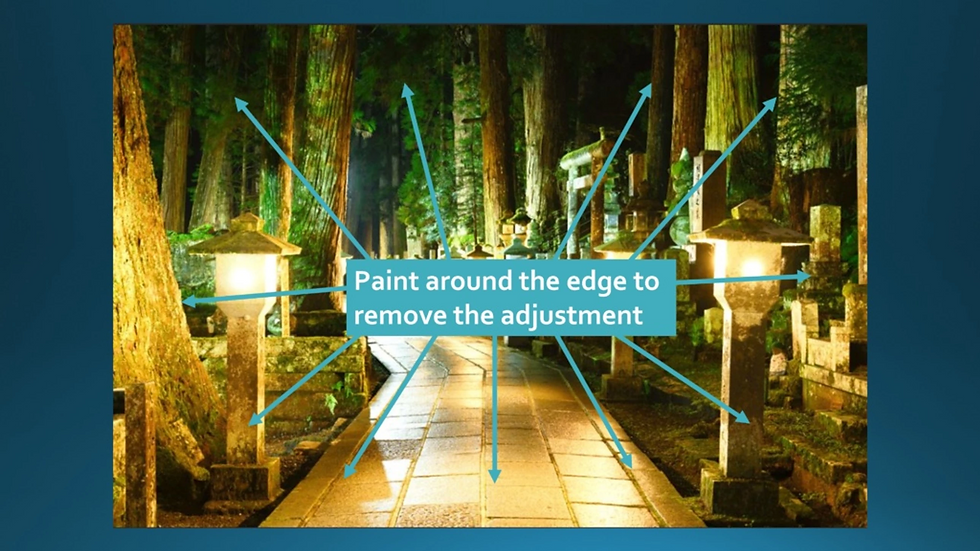
Next, paint the BLACK colour around the edge to remove the Curves Adjustment.
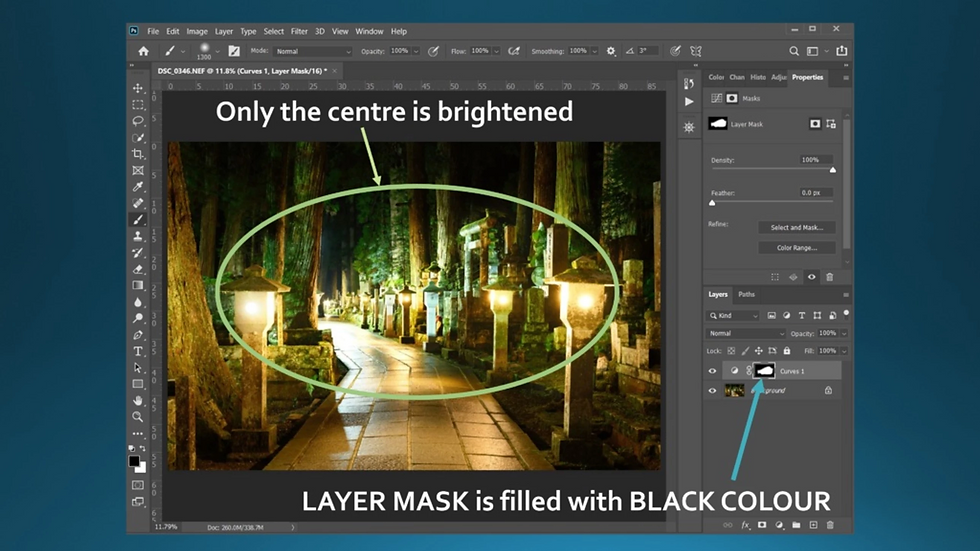
You should see only the centre of the photo is brightened now. At the same time, notice that the LAYER MASK is filled up with BLACK colour now.
If you want to see how the LAYER MASK is looked like now, you can hold Alt + Click on the LAYER MASK to toggle this LAYER MASK view.
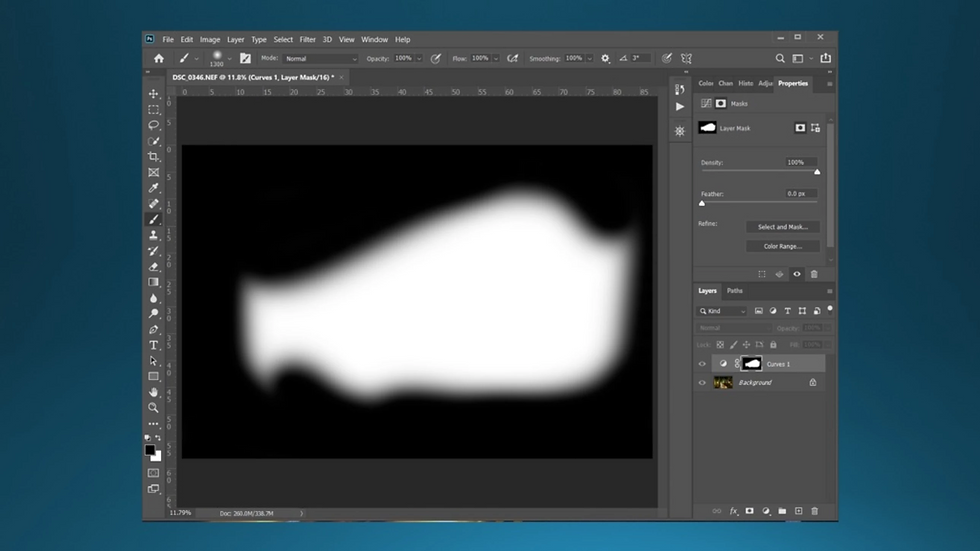
Holding Alt + Click on the LAYER MASK again to exit the LAYER MASK view.
For your information, this process of brushing the LAYER MASK with WHITE/BLACk is known as MASKING.
Now, you have completed your first CURVES Adjustment using LAYER MASK! Congrats!
ONE MORE THING…
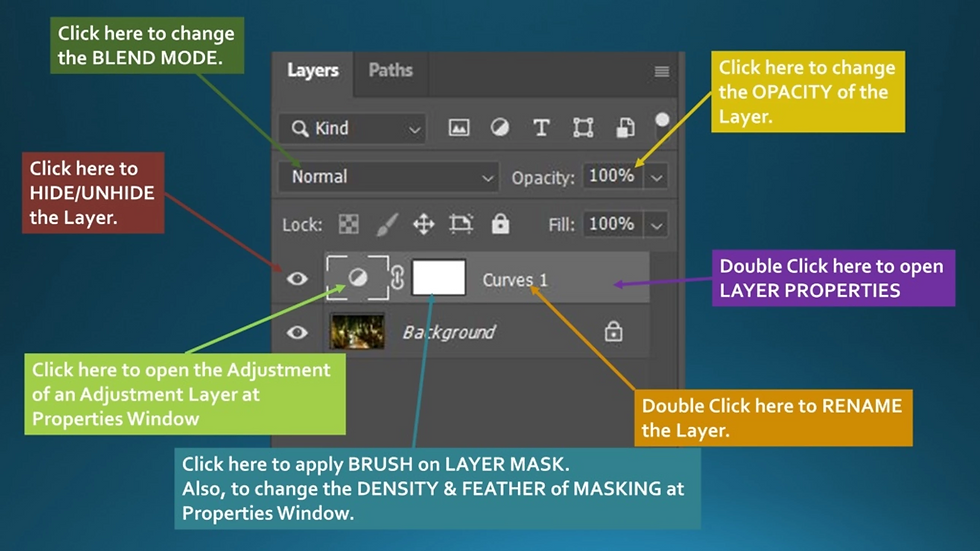
To give you a better understanding of the LAYER PANEL interface, here’s a photo with descriptions for each icon that is commonly used by photographers. 🙂
I hope this article helps you in understanding Photoshop better, if you have any questions, feel free to leave me a comment here or email me at grey1217@gmail.com.
Happy editing!

Join our Photography Masterclass Community & improve your photography skill.
Subscribe to receive photography tips & tricks and update from Grey Chow
Please feel free to share this post if you enjoy reading it! :)
.png)
Comments